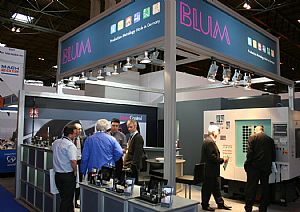
Blum Maximises Success at MACH 2012
26 April 2012

'A complete success' is how Blum Novotest described the recent MACH 2012 exhibition. As market leading suppliers of innovative, high-quality measuring and testing technology, the Lichfield based company was delighted with the quality of its enquiries at MACH with a large number of aerospace and Oil & Gas OEMs registering their interest in the company's touch probes and TMAC tool monitoring solution.
For the elimination of broken cutting tools and the resultant damage or scrapping of components, the new Tool Monitor Adaptive Control (TMAC) system protects the CNC machine while providing valuable information regarding the cutting process.
The TMAC is an addition to the Blum product portfolio that has been developed by Caron Engineering, a technical partner of Blum Novotest. The system reduces the high cost of replacement tools, lost production and rejected parts by effectively measuring tool wear in real time. It operates on the principle that the horsepower required to cut a part increases as the condition of the cutting edges of the tool deteriorates. Saving existing customers tens of thousands of pounds each year, the TMAC generated a buzz of activity around the Blum stand at MACH.
Alongside the innovative TMAC and also receiving its MACH debut was the impressive new TC76-N Digilog touch probe for turning and round work applications. Ddesigned for both tool and workpiece measurement in turning machines, the TC range of probes have delivered remarkable levels of success for end users demanding on-machine measuring solutions. With the new TC76-Digilog, Blum-Novotest is introducing the worlds first touch probe for robust use in machine tools, combining digital and analogue technology in a 25mm diameter device. Transmitting 50,000 readings per second, this technology was of major interest to MACH visitors.
Highlighting its full range of established touch probes, Blum also exhibited its market leading TC50 and TC52 Workpiece Touch Probes. With a diameter of 40mm and an effective length from spindle nose to stylus tip of only 112mm, the TC52 sets new standards. This system has a completely innovative opto-electronic measuring unit and compared with competitor probes, the TC52 has the same measuring results when probing in various direc¬tions. For higher accuracy, versatility and reliability, Blum-Novotest demonstrated its outstanding TC53-10 probe that is used on milling, turning or combined mill/turn machines for tool and workpiece measurement.
Also regarded as the technology leader with regards to tool setting systems, Blum Novotest was also delighted with the high quality enquiry levels for its LaserControl NT-H3D. The LaserControl NT-H3D is an adaptation of the already established Blum LaserControl non-contact tool setting technology, which was also on show at MACH. The LaserControl NT-H3D provides non-contact measurement of rotating tools as well as the mechanical measurement of non-rotating tools in five approach directions.
With the increasing use of mill/turn centres, Blum Novotest developed the LaserControl NT-H 3D to cater for the demands of these machine types. Traditionally, turning tools are measured with a mechanical probe and milling tools with a laser, the NT-H 3D eliminates the need for both these types - significantly improving setting times. The LaserControl NT-H 3D can set the radius & tool length for both turning and milling tools and this reduces set-ups and reduces machine downtime.
Alongside the LaserControl at MACH was the renowned Z-Series of probes. The accomplished Z-Nano is an extremely compact tool measuring system that can be used on CNC machining centres to conduct automatic tool length measurement and breakage detection. It can also undertake temperature compensation in one machine axis.
The new Z-Nano works with a ball guideway to reduce measuring forces. The advantage is that now even smaller tools starting from 0.1mm diameter can be measured, depending on tool geometry and material. Furthermore, in its standard version the probe offers an impressively high repeatability of 0.5 µm 2σ. For special applications, it is also available with a High Precision design with a guaranteed repeatability of 0.2 µm 2σ.
This was complemented at MACH by the Z-Pico probe, an extremely compact tool length setting and breakage control system. The tiny Z-Pico can carry out machine compensation of the smallest tools in one machine axis. With a total height of only 55mm and a total width of just 28mm2 the Z-Pico is one of the smallest tool setters on the market, making it ideal for monitoring the smallest of tools like micro drills, small cutters and engraving tools. The Z-Nano and Z-Pico generated significant enquiry levels from the 'micro' manufacturing attendees at MACH.
Commenting upon the weeklong event, Mr David Mold, Managing Director of Blum Novotest said: "Many of our products are targeted at the general machine shop environment and we received a large number of quality leads from this portion of MACH visitors. However, a considerable percentage of our products are more suited to OEMs and high end precision manufacturers. Our high quality lead generation from engineers that work in this sector was an extremely pleasing point for us."


