Blum Measures Up for Medical Instrument Manufacturer

The requirements placed on the production of medical devices are similar to those for products from other industries automated, high-precision and efficient. Consequently, Stryker-Leibinger in Mühlheim-Stetten, Germany relies on production measurement technology from Blum-Novotest for its machining centres for medical instruments and implants.
"The production of instruments uses several milling machines from DMG Mori, particularly the DMU 50 and DMU 60 models. Three of these systems are equipped with LaserControl Micro Compact NT laser measuring systems and TC52 touch probes from Blum-Novotest," says Simon Heyse, the Milling team leader responsible for machinery procurement and equipment at Stryker. "The measuring systems enable unmanned production. Machine operators work on the milling machines during the early and later shifts, while the night shift is unmanned."
On weekends, work is unmanned around the clock, to this end the machines are equipped with workpiece storage units and handling systems that remove and insert workpieces during unmanned hours.
In order to ensure the smoothest possible unmanned operation, the machining must be monitored, if a tool breaks there is no one there to press the emergency stop button. Therefore, each tool from the 0.5mm ball nose cutter to the 63mm saw blade is measured using the laser measuring system after each machining process and prior to replacement in the tool magazine. Should the measuring system determine that the tool is broken, it is clear that the machining step was not properly completed. The workpiece is rejected and the broken tool is replaced in the next machining step by a new tool. This ensures that only one component is lost and that machining continues to run smoothly even in the event of a broken tool.
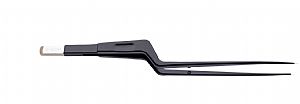
"The touch probe is used by the machine to register zero points or to check actual dimensions after machining. This enables worn cutters to be identified amongst other things," explains Simon Heyse. "With particular forceps, it may be that the blank is not correctly inserted. Then the milling cutter does not run laterally over the handle to create gripping grooves, but slams into the blank and breaks."
These special profile milling cutters can have a delivery time of up to nine weeks, which is why the Mühlhofen company would like to avoid breakages. Therefore, it has inserted a short measurement sequence at the beginning of the NC program, whereby the touch probe touches the forceps handle and ensures that it is correctly clamped.
The BLUM laser measuring systems were included with the DMG Mori milling machines. However, at that time, touch probes from another manufacturer were still being used for workpiece measurement. But when the Stryker NC specialists saw the BLUM TC52 at the AMB Show, they also switched to Blum products here and were surprised that it was possible to touch so quickly.
The BLUM probes can be pre-positioned at 40m/min, while the maximum speed of the old probes was 3 to 5 m/min. Naturally, the actual touch movement must be slower, but even here, at 2 m/min, the BLUM probe is able to touch a lot quicker than its predecessor. The high positioning speed and the rapid touching shorten the measurement processes considerably. On the one hand, the machining time is significantly reduced, on the other hand an additional measurement cycle, which is inserted to make the process more reliable, does not require as much time as before.
"We no longer only use the laser measuring systems for breakage control, but also measure the cutting of shaft and T-slot cutters, drills or gear cutting tools for wear and chipping. The concentric runout of the tools and the complete form of cutters are also measured by laser," explains manufacturing engineer Jörg Hermann. "Our pre-setting device is now very rarely used, since we calibrate the tools directly in the machine. It is quick and easy and has the crucial advantage that the tools are measured under rated speed and in the real clamping situation. This enables us to offset any influences from the machine, making our machining even more precise."
If all tools are still OK after machining and the program has completed without any error messages, the workpiece must be OK thanks to the measurements, the Stryker manufacturing experts can be certain of this during the process. Nevertheless, a milling machine is no measuring machine, so the first, middle and last part of each production order are verified on the coordinate measuring machine.
Thanks to the high speeds possible with the BLUM touch probes, the measuring processes are 50-70 percent shorter. "Without the BLUM laser measuring system, the reliability of the unmanned operation that we have here would be unthinkable. Details such as special blowing nozzles demonstrate how comprehensively BLUM analyses the entire process within which the products work. The next systems will certainly be equipped with BLUM measuring technology," says Jörg Hermann positively.


