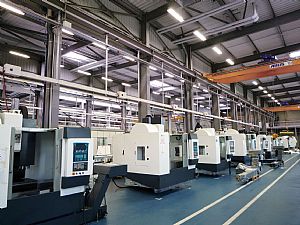
Blum-Novotest Building A Successful Relationship With Huron

The first contact between Blum and Huron was made through the German manufacturers' laser tool setting technology. The varied customer needs induced Blum-Novotest to develop mechanical tool setting systems based on the technical expertise it has gained with its laser systems. Today, Huron is proud to be able to offer these measuring systems on its own machines.
A price war is raging in the world of machine tools and although Huron is 100% convinced of the advantages of providing laser measuring systems on its machines, the company offers its customers mechanical tool setting systems from Blum-Novotest.
Thanks to these cost-efficient probes, we can now offer measuring systems in all machining centres and all areas of application, says Dominique Lutz, Sales Manager at Huron.
The General Manager at Huron, Mr Bernard Echevard comments: The most important functions of the laser systems were adopted by the Blum-Novotest tool setting systems. Moreover, Blum-Novotest is significantly more reliable than other suppliers and their customer service is really fast.
The two companies look back on many years of close cooperation world-wide. As Mr Guillaume Thenon, Branch Manager of Blum-Novotest France, explains: Huron has been a partner of Blum from the very onset of our laser technology, particularly in the field of software development. So obviously, we benefited from these synergies when introducing the tool setting probes.
Fast and precise
Blum-Novotest offers three different measuring solutions for the Huron machine tools; the Non-contact laser tool setting systems, of which several hundreds have been sold with Huron machining centres in recent years; the TC Series probes for workpiece measurement during and after machining and the mechanical tool setting systems. The best-selling probes for Huron have proven to be the multi-directional TC52 systems for small machining centres. These probes offer a 40mm probe diameter with a repetition accuracy of 0.3microns at a probing speed of 2m/min and the TC50 universal probe with a 63mm probe diameter delivers accuracies and speeds identical to the TC52.
These systems work with infrared transmission, the technology at the core of the Duo-Pack touch probe/tool setting probe. In duo mode, both systems work with a single receiver. The system surprises end users with the accuracy that it can achieve when compared to a co-ordinate measuring machine (CMM). An additional advantage of machine-integrated measurement is the time factor. This is because it is no longer necessary to waste any time transporting the parts between the shop floor and the quality control department. Even if users believe they have bought the machine tool for production and not for measuring, the integration of measuring systems in the machine in combination with a measuring program running during the machining cycle can result in significantly increased productivity.
Productivity Gains
Nowadays, technical cooperation is nothing out of the ordinary. A company producing parts for the aerospace industry recently ordered four new large machine tools in order to increase its productivity. The technical consultation took several weeks. In the end, it was decided to equip one of the machines with a Duo-Pack. Together, the three partners developed a 100% reliable and particularly fast solution for tool breakage detection.
To reduce idle times as much as possible, the measuring procedure was to be optimised, so the parts would be produced in the desired quality at maximum productivity. The success of the first installation delivered exceptional results. The three remaining machines were equipped in the same manner soon after the success of the first machine was realised.
Following this success, a German customer needed to check its parts after processing for dimensional consistency. To demonstrate how the productivity of the machine could be increased using the 'Duo-Pack' equipment from Blum-Novotest, Sebastian Schmitt, an Application Engineer at Blum comments: Machine-integrated measurement takes a lot less time than having to remove the part, conduct measurements on separate measuring machines and subsequently clamp it again for secondary machining. This process, which is usually only available for our 5-axis machines, was adapted to a 3-axis machine in this instance. A simple solution that yielded productivity gains.
As Huron's Mr Echevard emphasises: Thanks to the continued exchange between our technical departments, we are often the first to hear any news from Blum-Novotest. This often gives us a competitive edge. We are constantly on the lookout for innovations that can be integrated into our machines. This takes time and money for product development, implementation and customer training. Ultimately, the resulting added value helps to differentiate us from our competitors!
As Blum's Mr Thenon agrees: Huron is by far our most important partner in France! This exchange of technology is not a one-way street and this is why both parties benefit from it. The coordination between Blum-Novotest and Huron is very important for the machine manufacturer. We generate 80% of our turnover from exports today. The first question that always concerns our customers is service and accessories. We have to be able to respond to the requests of our customers immediately regardless of global location. We have to provide next-day delivery of spare parts for our customers - as we all know: Time is money."

