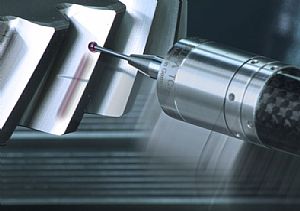
EMO 2011 Launch of the touch probe revolution from Blum-Novotest
5 October 2011

At EMO 2011, German metrology specialist Blum Novotest successfully launched its new TC76-DIGILOG. As the worlds first touch probe for robust use in machine tools that com-bines digital and analogue technology, the TC76-DIGILOG proved a resounding success, as did all the proven technologies available from the leading supplier of innovative manu-facturer of high-quality measurement and testing technology
Previously, analogue touch probes that measure and analyse the deflection of the stylus and do not simply emit a digital On/Off signal were very large and costly and for the most part could only be found in coordinate measuring machines. With the TC76-DIGILOG, Blum has introduced a touch probe that brings together digital and analogue technology in a 25mm diameter device, the digilog touch probe.
Following consultation with customers, Blum has developed an exciting new concept that is truly brilliant. If you can measure the start of the shadowing of the light barrier, it must also be possible to analyse the percentage increase in the shadowing that occurs when the stylus is deflected ever further. This enables an analogue signal to be generated that greatly extends the range of application of touch probes in the machining centre and can also save a great deal of time. When mechanically connected, the TC76-DIGILOG touch probe is compatible with typical 25mm touch probes with an M16x1 fastening screw thread. So, digital measurement continues to be possible without restriction.
Analogue measurement always offers advantages when surfaces or lines are being as-sessed, for example when a workpiece surface has to be checked for machining errors. When a switching digital probe is used, a very large number of points have to be meas-ured to achieve an adequate resolution, whereas an analogue probe can be moved in scanning mode over the surface and records more points in a fraction of the time. Aston-ishing speeds of up to 2 m/min are possible with outstanding accuracy.
Alongside the exciting new DIGILOG at EMO were other recent product launches such as the TMAC tool monitoring solution. The ingenious new Tool Monitor Adaptive Control (TMAC) system protects your CNC machine while providing valuable information regarding the cutting process. The system reduces the high cost of replacement tools, lost production and rejected parts by effectively measuring tool wear in real time. It operates on the principle that the horsepower required to cut a part increases as the condition of the cutting edges of the tool deteriorate.
The TMAC system comprises of a main controller, horsepower transducer, vibration sensor and the TMS display software all of which can be simply integrated into any CNC machine tool and Windows based PC. The software conveniently enables the machine to be monitored from the shop floor or remotely from the office. It can also work in conjunction with the Blum laser control system where tool breakage detection and tool wear monitoring is done with TMAC. Whilst tool length and radius measurement, compensation of thermal effects or the deviations because of high spindle speeds can be measured with the laser.
These exceptional new developments were extremely well received by visitors to EMO whilst established and successful products like the LaserControl NT-H 3D and the Z-Probe series for tool setting and measurement also had stand visitors intruiged.
The Blum stand showed the established TC50 Workpiece Touch Probe and the TC52. With a diameter of 40mm and an effective length from spindle nose to stylus tip of only 112mm, the TC52 has a completely innovative optoelectronic measuring unit and com-pared with competitor probes, it has the same measuring results when probing in various direc¬tions.
For higher accuracy, versatility and reliability, Blum-Novotest presented the TC53-10 probe that is used on milling, turning or combined mill/turn machines for tool and workpiece measurement. It appeared alongside the TC53-20 probe, an alternative to the proven Z-Nano IR for tool setting in all three axes. The TC53-20 and TC53-10 probes incorporate Blums revolutionary ´Shark360` technology that introduces an ingeniously-designed face gear mechanism in the body of the probe assembly to ensure maximum accuracy in all directions for measuring with off-centre styli.
For additional turning and round work applications, Blum presented its established TC76-N touch probe with measured success. The probe has been designed for both tool and workpiece measurement in turning machines.
To support the measurement of the workpiece and working in conjunction with the TC range of Blum spindle probes, Blum highlighted its new FormControl V3 software at EMO. This latest addition to the FormControl software family is ideal for 5-axis applications and it allows the end user to eliminate additional CMM set-up times. For further details on the new or established product portfolio from Blum and how the new products can improve productivity, please contact your local Blum office.


