Innovative measuring systems for precision instruments

When manufacturing very small parts, even a very minor temperature-related fluctuation in the machining centres can mean rejection. This is why Günter Stoffel Medizintechnik GmbH has turned to production metrology from Blum-Novotest for temperature compensation as well as other measuring tasks.
The company has turned to Blum because the smallest workpieces produced are less than one millimetre wide and extremely precise. A microscope mounted on the vice nothing is a more appropriate symbol of the manufacturing method at Stoffel GmbH which specialises in the development and manufacture of high-quality surgical and endoscopic instruments.
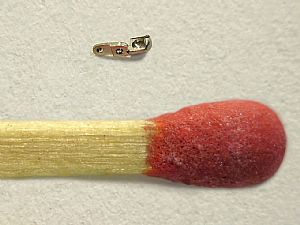
The requirements are extreme, the spoons for the smallest biopsy forceps are 0.8 mm wide, the blade width on the edge of the spoon is just 0.01mm and the two blades must meet precisely when closed. There are many work stages to be carried out by hand, such as deburring, polishing and adjusting for perfect function or riveting of the forceps joint.
In order to reduce manual work to a minimum, it has become of immense importance for the company from the city Tuttlingen, Germany, to produce as high-precision parts as possible using the CNC machines. "During assembling, every one hundredth of a millimetre becomes noticeable," explains Managing Director Dieter Stoffel.
Chip removal is carried out at Stoffel in a basement without air conditioning. The machines working there have computational temperature compensation, which calculates the compensation values using data such as travel distance, spindle speed and usage duration. In a normal manufacturing operation, that would function reliably, however, with frequent tool changes, internal compensation reaches its limits.
The problem was discussed during a joint visit by Blum sales representative Erhard Strobel and the responsible 'W&R' machine tool dealer. The solution was the Z-Pico touch probe, which facilitates the very precise measurement of the length of the tools and the corresponding compensation of the axes. "One problem is our very thin tools. They include a 0.5 mm centre drill, where the tip will break with the slightest incorrect load, with the drill becoming two to three micrometres shorter," explains the responsible production manager, discussing the advantages of the Z-Pico. Naturally, this has a corresponding effect on the precision. The Z-Pico has an extremely low measuring force, making it ideal for use with small tools.
Inside the probe is a high-precision linear guide which ensures there are absolutely no lateral forces, thereby enabling the measurement of very small, sensitive or long tools. "Tools with a diameter of 0.05mm or more can be registered," stresses Erhard Strobel. "In addition, the switch signal is generated opto-electronically by shading a miniature light barrier inside the device. This principle is wear-free and delivers consistently high measuring precision even after millions of cycles of operation."
The two measurements for temperature compensation are only configured in the NC program after the rough machining operations, because these do not require a high degree of accuracy.
The finishing tools are measured directly before machining, at which point the temperature behaviour of the tool holder is also considered. As each part is measured using the Z-Pico and the correction factor is continuously adjusted, all temperature fluctuations throughout the day are reliably intercepted. The measuring process requires only a few seconds, because the tools are positioned for measurement shortly before the longest possible tool dimension with a rapid feed rate.
In one of the machining centres, in which predominantly round-handled instruments are manufactured, a Blum LaserControl Micro Compact NT laser measuring system is used instead of the Z-Pico. When machining the round handles, the precision of the Y axis is of particular importance. This meant it was necessary to measure not only in the Z direction but also in the Y direction.
Since Stoffel has been using the Blum laser, an increase in length is no longer an issue, the system corrects both the misalignment of the tool as well as the axis and the table itself. "Some NC operators mill a circular pocket in the surface of the machine table and touch this with a probe, but I think that is too uncertain," explains Dieter Stoffel. "We have such small chips that one could become trapped in the pocket, thereby distorting the measurement. The laser measuring system is fitted with a special blowing system that cleans the reference tool prior to measurement so it is always correct."
The production metrology from Blum has completely proven itself in Wurmlingen. Whilst previously it was necessary to allow the machine to warm up for 20 minutes, and despite this, a few bad parts were still produced before the desired precision was achieved. The medical devices produced by Stoffel GmbH have also become more accurate thanks to the Blum measuring systems. "Furthermore, this has meant that the impression which surgeons gain of the instruments quality has improved somewhat."
"In the past, we measured manually and then manually entered the compensation values," reports Dieter Stoffel. "If you made a mistake for any reason, it could lead to catastrophic crashes in the machine. Today, the machine stops automatically when the compensation value is greater than four hundredths."


